

It is immediately apparent that the DeathAdder has the exact same bodyshape as the Microsoft Habu. This is unsuprising since the Habu was built as a joint effort between Microsoft and Razer. The body is a sleek and ergonomic right-handed sweep, owing much to the popular shape of the Microsoft Intellimouse Explorer 3.0. For anyone that has used the slug-like shape of the Intellimouse, the DeathAdder should be instantly comfortable. Those that didn't like the Copperhead or Diamondback body shape should take a second look at this new mouse.
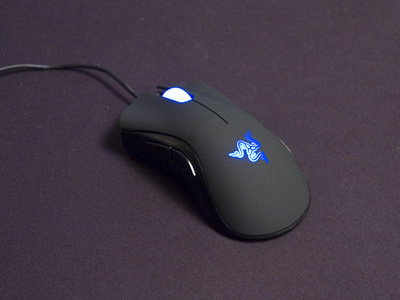
The Razer DeathAdder
Unlike the Habu, Razer have gone for simple and elegant lines. Where the rubberised buttons of the Habu end half-way down the mouse body, the entire top of the DeathAdder is made from one flowing rubberised sheet, split at the front to form the two main buttons. The side and ba
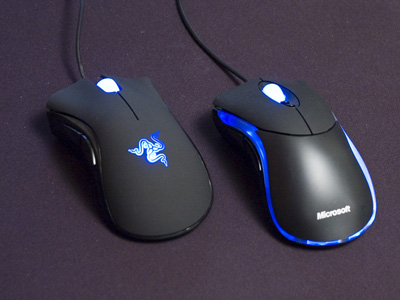
DeathAdder vs Habu
The mouse has a total of 5 customisable buttons. The main two are at the front of the mouse as you'd expect with a standard wheel between them acting as the third button. The remaining two are placed on the left side of the mouse for thumbclicks. I found the placement spot on for my needs, with both of the side buttons in easy reach of my thumb. Unlike the Habu you don't get an alternate button set, but I thought it was an unnecessary excess on the Habu anyway.
The buttons on Razer mice have always been light to use, as opposed to Microsoft and Logitech where the click action is more positive. The DeathAdder has Razer st
On the underside of the mouse is one more button used to change between different profiles of response rate and resolution. With the drivers installed you can set up various preferences for the mouse that can be swithed by clicking the small profile button. The resolution can be changed from 450dpi to the DeathAdder's maximum of 1800dpi. The frequency can be changed between 125Hz, 500Hz and 1000Hz.
The teflon feet of the DeathAdder are placed in Razer's distinctive shape: two corner pieces at the front and a long strip at the back. The front feet are slightly bigger than those of the Habu, but this didn't affect friction on the mouse surfaces I tried.
DeathAdder Drivers and Software
I was pleasantly suprised by the lack of problems setting up the DeathAdder. With the many complaints I've read about the Habu I was wondering if installing the mouse might take all day. Infact it was just a case of plugging it in, inserting the driver cd, and following the on-screen instructions.
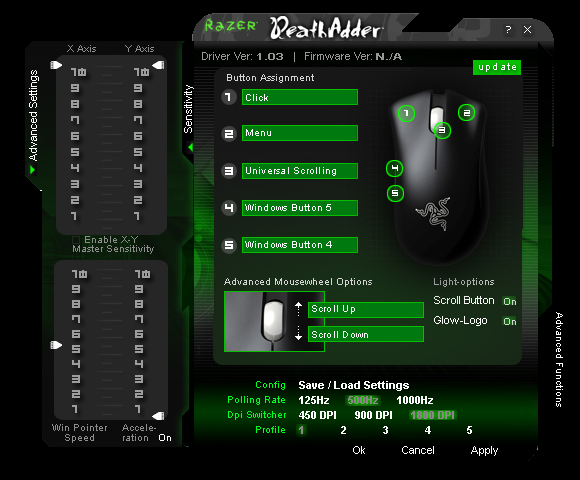
DeathAdder Software
The drivers let you adjust the polling rate and resolution on the five different preset profiles stored on the mouse. You can adjust the X and Y axis sensitivity independently using the advanced settings, and there is an option of using driver acceleration.
All of the buttons and even the mousewheel up/down movement can be mapped to customised controls.
The Razer DeathAdder
Unlike the Habu, Razer have gone for simple and elegant lines. Where the rubberised buttons of the Habu end half-way down the mouse body, the entire top of the DeathAdder is made from one flowing rubberised sheet, split at the front to form the two main buttons. The side and ba
DeathAdder vs Habu
The mouse has a total of 5 customisable buttons. The main two are at the front of the mouse as you'd expect with a standard wheel between them acting as the third button. The remaining two are placed on the left side of the mouse for thumbclicks. I found the placement spot on for my needs, with both of the side buttons in easy reach of my thumb. Unlike the Habu you don't get an alternate button set, but I thought it was an unnecessary excess on the Habu anyway.
The buttons on Razer mice have always been light to use, as opposed to Microsoft and Logitech where the click action is more positive. The DeathAdder has Razer st
On the underside of the mouse is one more button used to change between different profiles of response rate and resolution. With the drivers installed you can set up various preferences for the mouse that can be swithed by clicking the small profile button. The resolution can be changed from 450dpi to the DeathAdder's maximum of 1800dpi. The frequency can be changed between 125Hz, 500Hz and 1000Hz.
The teflon feet of the DeathAdder are placed in Razer's distinctive shape: two corner pieces at the front and a long strip at the back. The front feet are slightly bigger than those of the Habu, but this didn't affect friction on the mouse surfaces I tried.
DeathAdder Drivers and Software
I was pleasantly suprised by the lack of problems setting up the DeathAdder. With the many complaints I've read about the Habu I was wondering if installing the mouse might take all day. Infact it was just a case of plugging it in, inserting the driver cd, and following the on-screen instructions.
DeathAdder Software
The drivers let you adjust the polling rate and resolution on the five different preset profiles stored on the mouse. You can adjust the X and Y axis sensitivity independently using the advanced settings, and there is an option of using driver acceleration.
All of the buttons and even the mousewheel up/down movement can be mapped to customised controls.